In this blog post, I will demonstrate how to use Dapr & .NET Aspire to build a distributed application and deploy it to a locally running Kubernetes cluster. To know more about .NET Aspire , please refer to my previous blog posts: .NET Aspire and Aspirate (Aspir8).
What is Dapr?
Dapr is a portable, event-driven runtime that makes it easy for any developer to build resilient, stateless, and stateful applications that run on the cloud and edge and embraces the diversity of languages and developer frameworks.
NOTE: I have been following Dapr from the beginning, and I make a point to use it whenever possible. It effectively helps developers build distributed applications with greater efficiency.
Any language, any framework, anywhere
Dapr provides distributed system building blocks for you to build microservice applications in a standard way and to deploy to any environment. Each of these building block APIs is independent, meaning that you can use any number of them in your application.

Creation of DEMO App
The DEMO app is based on the Aspire starter template, which includes a frontend (ASP.NET Core Blazor App), a backend (ASP.NET Core Minimal API), Service Default and AppHost projects to demonstrate Aspire's working & capabilities.
dotnet new aspire-starter --output AspireWithDaprOnce the demo application is created successfully, you can execute it using the command mentioned below.
dotnet run --project ../AspireWithDapr/AspireWithDapr.AppHostOnce the command has been executed successfully, you can open the dashboard by clicking the URL found in the host section of the terminal window. The dashboard provides options for Resources, Console, Structured Logs, Traces, and Metrics.
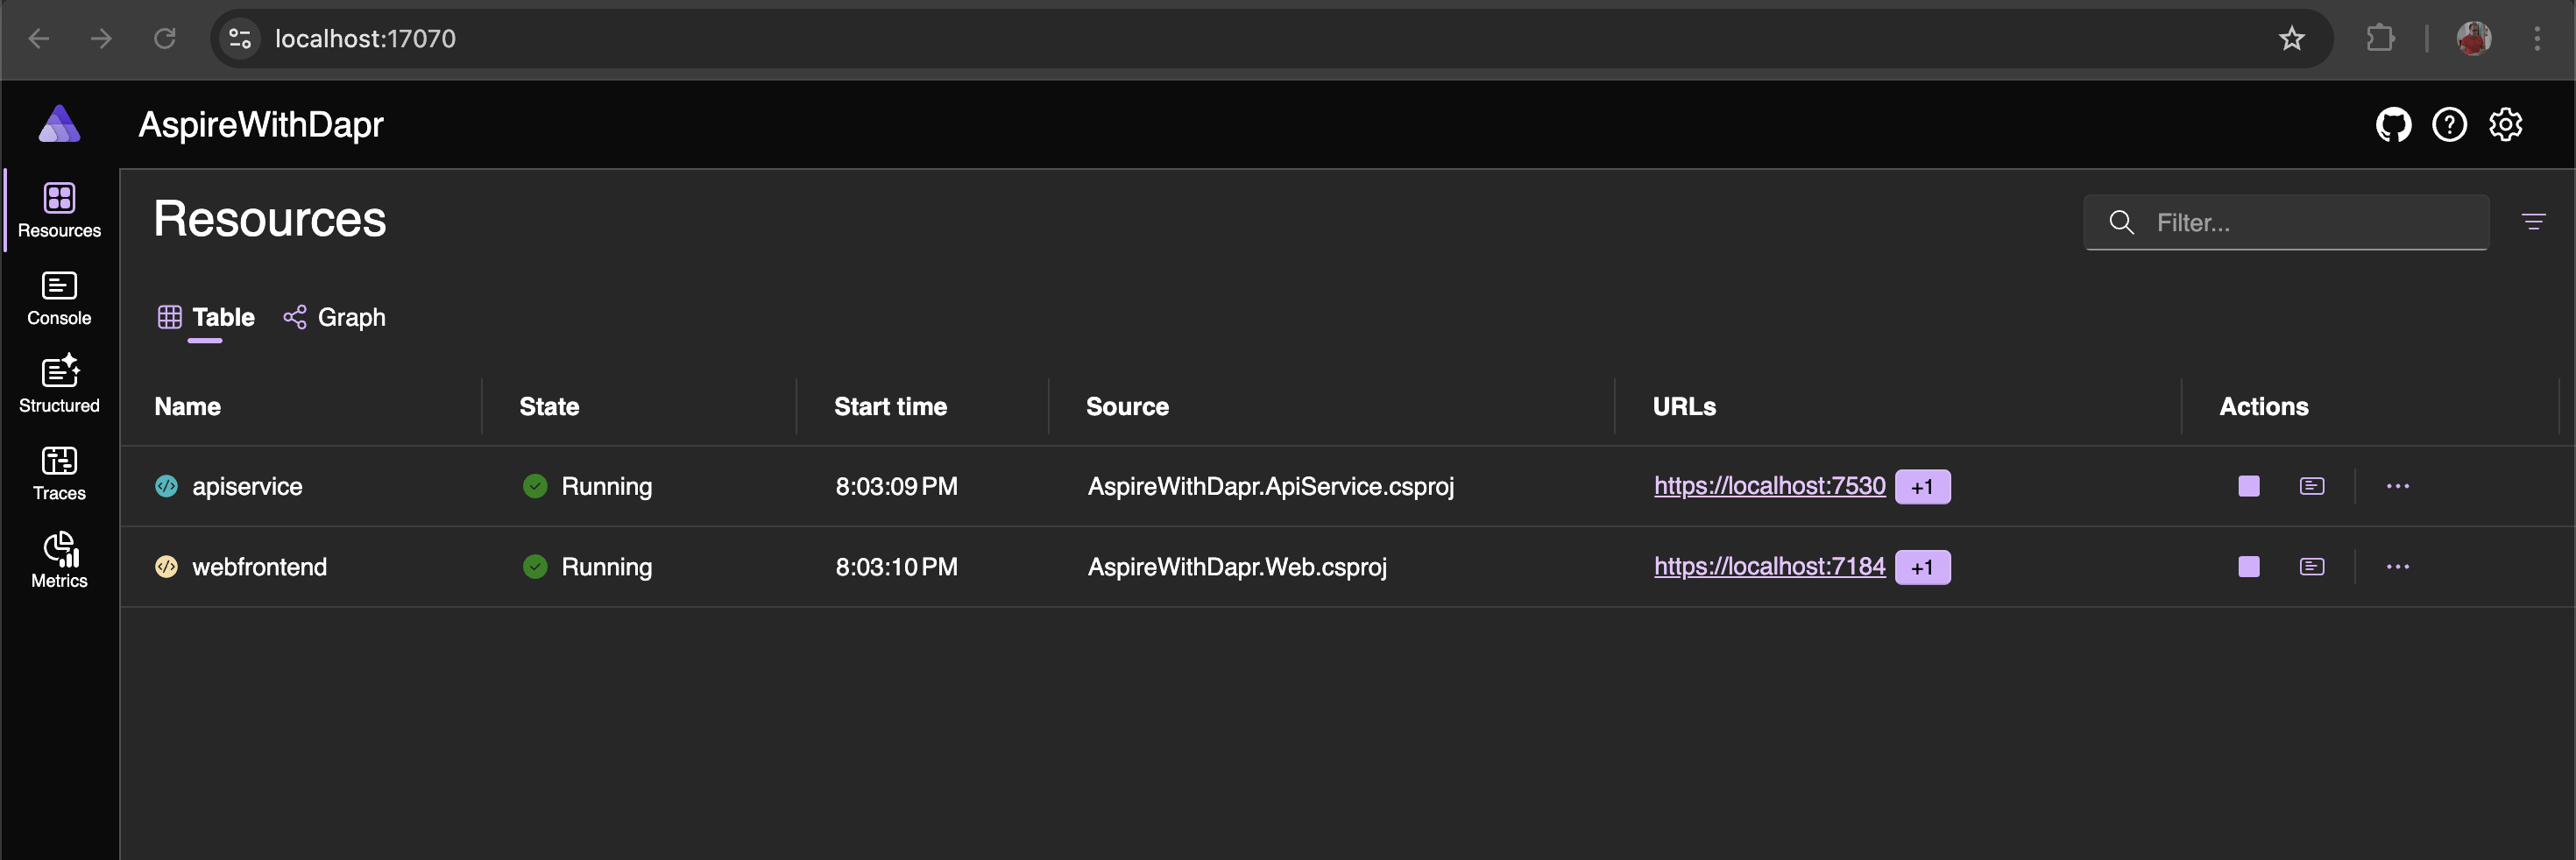
NOTE: For prerequisites & step-by-step guidance, please refer to my earlier blog post, .NET Aspire and Aspirate (Aspir8). I utilized Aspirate (Aspir8) for managing the generation of deployment YAML files. Additional information on what Aspirate (Aspir8) is and how to use it can also be found in the same post.
Dapr-ization of DEMO App
Lets start with installing Dapr CLI and setting up the local environment. Dapr CLI is main tool for various Dapr-related tasks including
- Run an application with a Dapr sidecar
- Review sidecar logs
- List running services
- Run the Dapr dashboard
# Install via Homebrew
brew install dapr/tap/dapr-cli
# Verify the installation
dapr -h
         __
     ____/ /___ _____  _____
    / __  / __ '/ __ \/ ___/
   / /_/ / /_/ / /_/ / /
   \__,_/\__,_/ .___/_/
             /_/

===============================
Distributed Application Runtime

Usage:
  dapr [flags]
  dapr [command]

Available Commands:
  annotate       Add dapr annotations to a Kubernetes configuration. Supported platforms: Kubernetes
  build-info     Print build info of Dapr CLI and runtime
  completion     Generates shell completion scripts
  components     List all Dapr components. Supported platforms: Kubernetes
  configurations List all Dapr configurations. Supported platforms: Kubernetes
  dashboard      Start Dapr dashboard. Supported platforms: Kubernetes and self-hosted
  help           Help about any command
  init           Install Dapr on supported hosting platforms. Supported platforms: Kubernetes and self-hosted
  invoke         Invoke a method on a given Dapr application. Supported platforms: Self-hosted
  list           List all Dapr instances. Supported platforms: Kubernetes and self-hosted
  logs           Get Dapr sidecar logs for an application. Supported platforms: Kubernetes
  mtls           Check if mTLS is enabled. Supported platforms: Kubernetes
  publish        Publish a pub-sub event. Supported platforms: Self-hosted
  run            Run Dapr and (optionally) your application side by side. Supported platforms: Self-hosted
  status         Show the health status of Dapr services. Supported platforms: Kubernetes
  stop           Stop Dapr instances and their associated apps. Supported platforms: Self-hosted
  uninstall      Uninstall Dapr runtime. Supported platforms: Kubernetes and self-hosted
  upgrade        Upgrades or downgrades a Dapr control plane installation in a cluster. Supported platforms: Kubernetes
  version        Print the Dapr runtime and CLI version

Flags:
  -h, --help                  help for dapr
      --log-as-json           Log output in JSON format
      --runtime-path string   The path to the dapr runtime installation directory
  -v, --version               version for dapr

Use "dapr [command] --help" for more information about a command.
To initialize Dapr in your local environment, use the Dapr CLI, This initialization process fetches and installs the Dapr sidecar binaries locally and creates a development environment that streamlines application development with Dapr. The recommended development environment requires Docker. Although you can initialize Dapr without Docker, this blog post utilizes Docker.
Dapr initialization includes
- Running a Redis container instance to be used as a local state store and message broker.
- Running a Zipkin container instance for observability.
- Creating a default components folder with component definitions for the above.
- Running a Dapr placement service container instance for local actor support.
- Running a Dapr scheduler service container instance for job scheduling.
# self-hosted mode
dapr init
NOTE: You can use different flag with the Dapr init command. To see the supported flags, please run dapr init -h.
# Verify Dapr Version
dapr -v
CLI version: 1.15.1
Runtime version: 1.15.6The dapr init command launches several containers that helps you to get started. You can check container status using command mentioned below or using Docker dashboard.
docker psCONTAINER ID IMAGE COMMAND CREATED STATUS PORTS NAMES
7eb799ffaca7 daprio/dapr:1.15.5 "./placement" About a minute ago Up About a minute 0.0.0.0:50005->50005/tcp, 0.0.0.0:58080->8080/tcp, 0.0.0.0:59090->9090/tcp dapr_placement
485e4ca49627 daprio/dapr:1.15.5 "./scheduler --etcd-…" About a minute ago Up About a minute 0.0.0.0:50006->50006/tcp, 0.0.0.0:52379->2379/tcp, 0.0.0.0:58081->8080/tcp, 0.0.0.0:59091->9090/tcp dapr_scheduler
34c323d1a652 openzipkin/zipkin "start-zipkin" 2 weeks ago Up 2 weeks (healthy) 9410/tcp, 0.0.0.0:9411->9411/tcp dapr_zipkin
4eb5d117f978 redis:6 "docker-entrypoint.s…" 2 weeks ago Up 2 weeks 0.0.0.0:6379->6379/tcp dapr_redis dapr_zipkin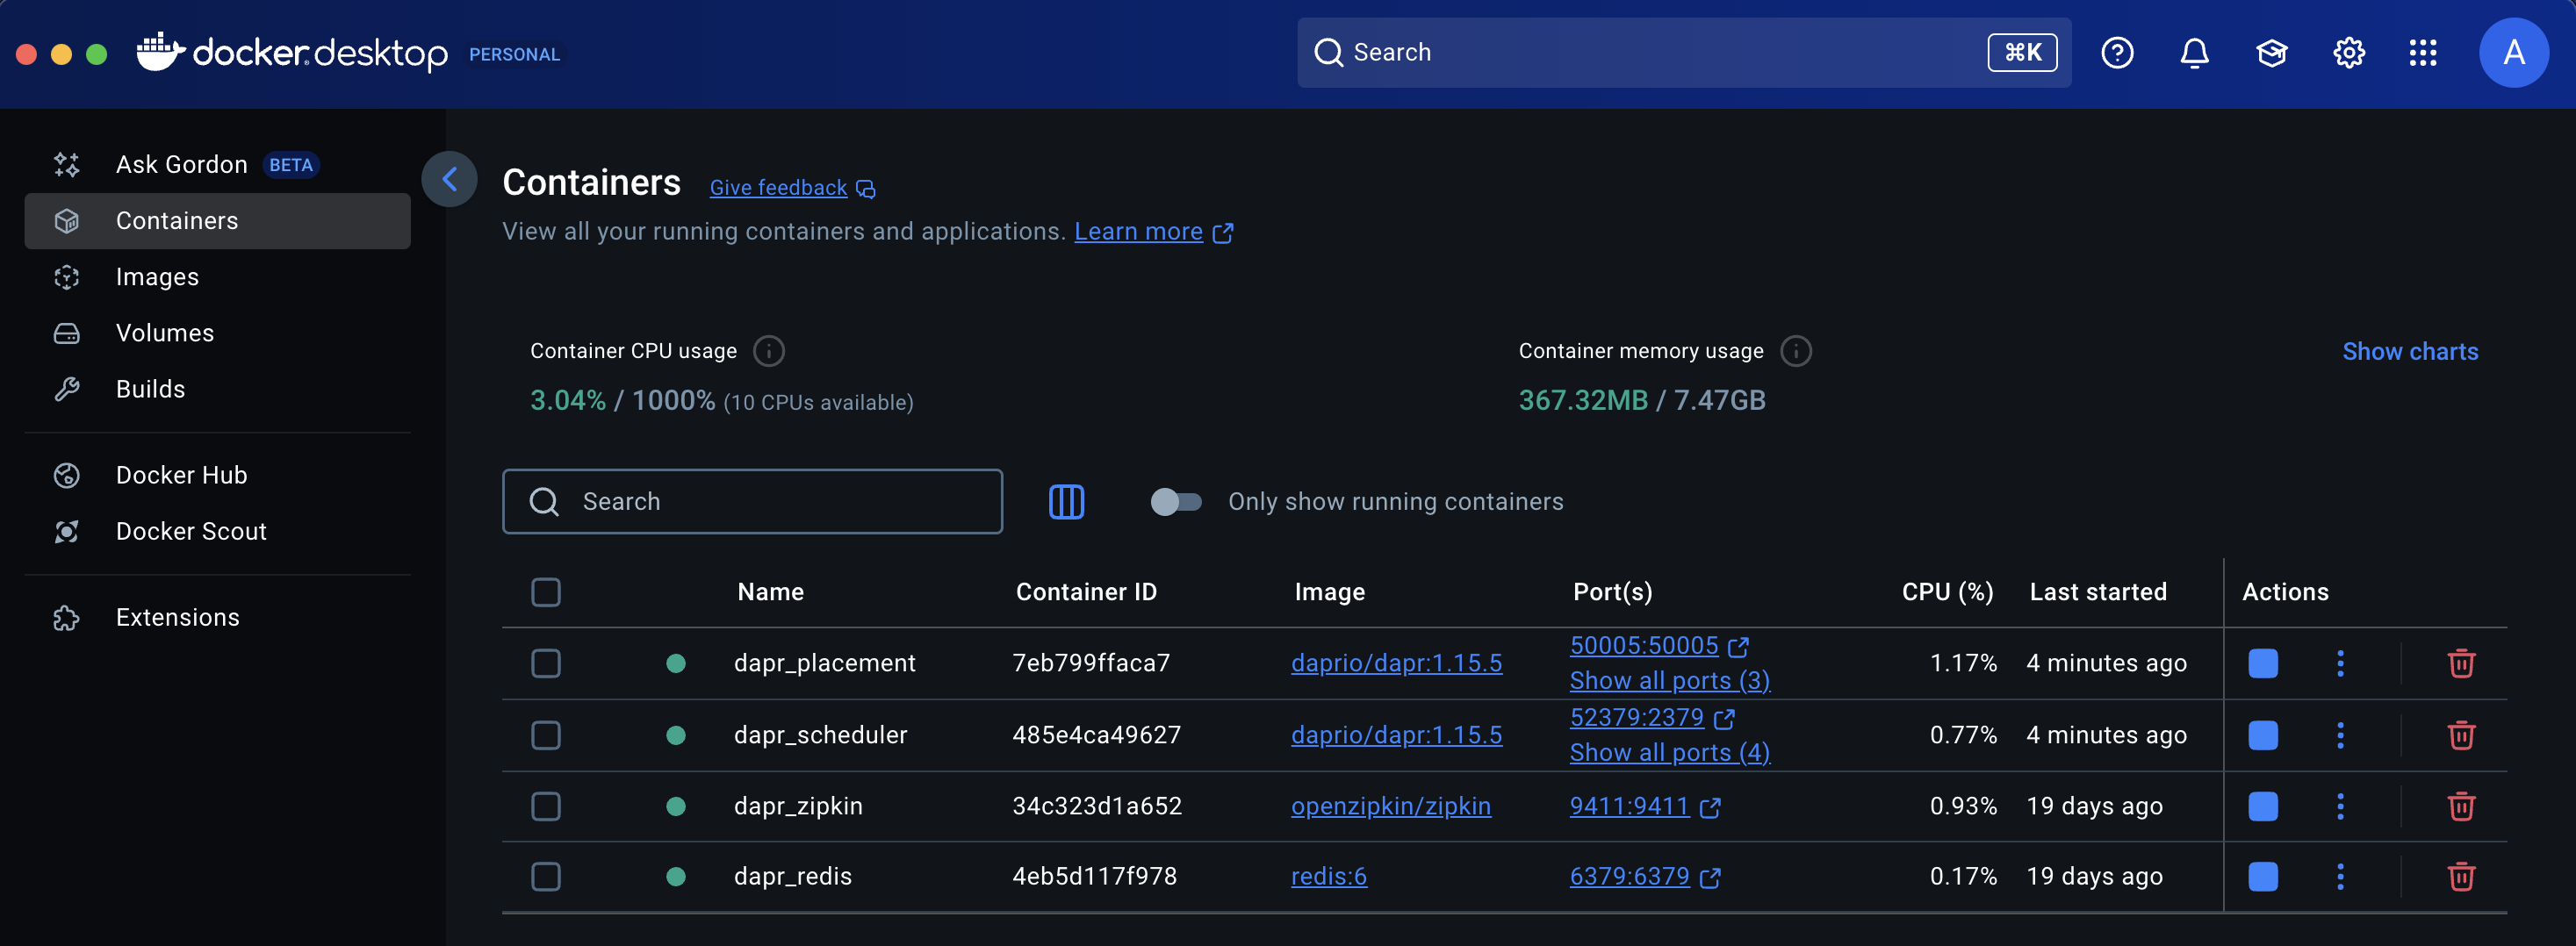
As both the Aspire-Based App and Dapr development are now ready, you can start Dapr-ization of the application.
Run the command below to add the CommunityToolKit Aspire Hosting Dapr Package to the AspireWithDapr.AppHost project.
dotnet add package CommunityToolKit.Aspire.Hosting.DaprAfter the addition, let's modify the Program.cs file according to the below code snippets.
var builder = DistributedApplication.CreateBuilder(args);

var apiService = builder.AddProject<Projects.AspireWithDapr_ApiService>("apiservice")
    .WithHttpsHealthCheck("/health")
    .WithDaprSidecar(); // Add Dapr sidecar to the API service

builder.AddProject<Projects.AspireWithDapr_Web>("webfrontend")
    .WithExternalHttpEndpoints()
    .WithHttpsHealthCheck("/health")
    .WithReference(apiService)
    .WaitFor(apiService)
    .WithDaprSidecar(); // Add Dapr sidecar to the Web Frontend

builder.Build().Run();
NOTE: Dapr uses the sidecar pattern to run alongside your application. The Dapr sidecar runs alongside your app as a lightweight, portable, and stateless HTTP server that listens for incoming HTTP requests from your app.
Run the command below to add the Dapr SDK for ASP.NET Core to the AspireWithDapr.Web project.
dotnet add package Dapr.AspNetCoreAfter the addition, let's modify the Program.cs and WeatherApiClient.cs files according to the specified code snippets.
# Program.cs
using AspireWithDapr.Web;
using AspireWithDapr.Web.Components;

var builder = WebApplication.CreateBuilder(args);

// Add service defaults & Aspire client integrations.
builder.AddServiceDefaults();

// Add services to the container.
builder.Services.AddRazorComponents()
    .AddInteractiveServerComponents();

builder.Services.AddOutputCache();

// Add Dapr client
builder.Services.AddDaprClient();
builder.Services.AddTransient<WeatherApiClient>();

var app = builder.Build();

if (!app.Environment.IsDevelopment())
{
    app.UseExceptionHandler("/Error", createScopeForErrors: true);
    // The default HSTS value is 30 days. You may want to change this for production scenarios, see https://aka.ms/aspnetcore-hsts.
    app.UseHsts();
}

app.UseHttpsRedirection();

app.UseAntiforgery();

app.UseOutputCache();

app.MapStaticAssets();

app.MapRazorComponents<App>()
    .AddInteractiveServerRenderMode();

app.MapDefaultEndpoints();

app.Run();
# WeatherApiClient.cs
namespace AspireWithDapr.Web;
using Dapr.Client;
public class WeatherApiClient(DaprClient daprClient)
{
public async Task<WeatherForecast[]> GetWeatherAsync(int maxItems = 10, CancellationToken cancellationToken = default)
{
List<WeatherForecast>? forecasts = await daprClient.InvokeMethodAsync<List<WeatherForecast>>(
HttpMethod.Get,
"apiservice",
"weatherforecast",
cancellationToken);
return forecasts?.Take(maxItems).ToArray() ?? [];
}
}
public record WeatherForecast(DateOnly Date, int TemperatureC, string? Summary)
{
public int TemperatureF => 32 + (int)(TemperatureC / 0.5556);
}At this point, you can run the application using the command mentioned below to check if the Dapr-related changes are functioning correctly.
dotnet run --project AspireWithDapr/AspireWithDapr.AppHostUpon successful execution of the command, you can access the dashboard by clicking the URL found in the host section of the terminal window. You will see two extra resources listed: apiservice-dapr-cli and webfrontend-dapr-cli, which correspond to the Dapr sidecars.

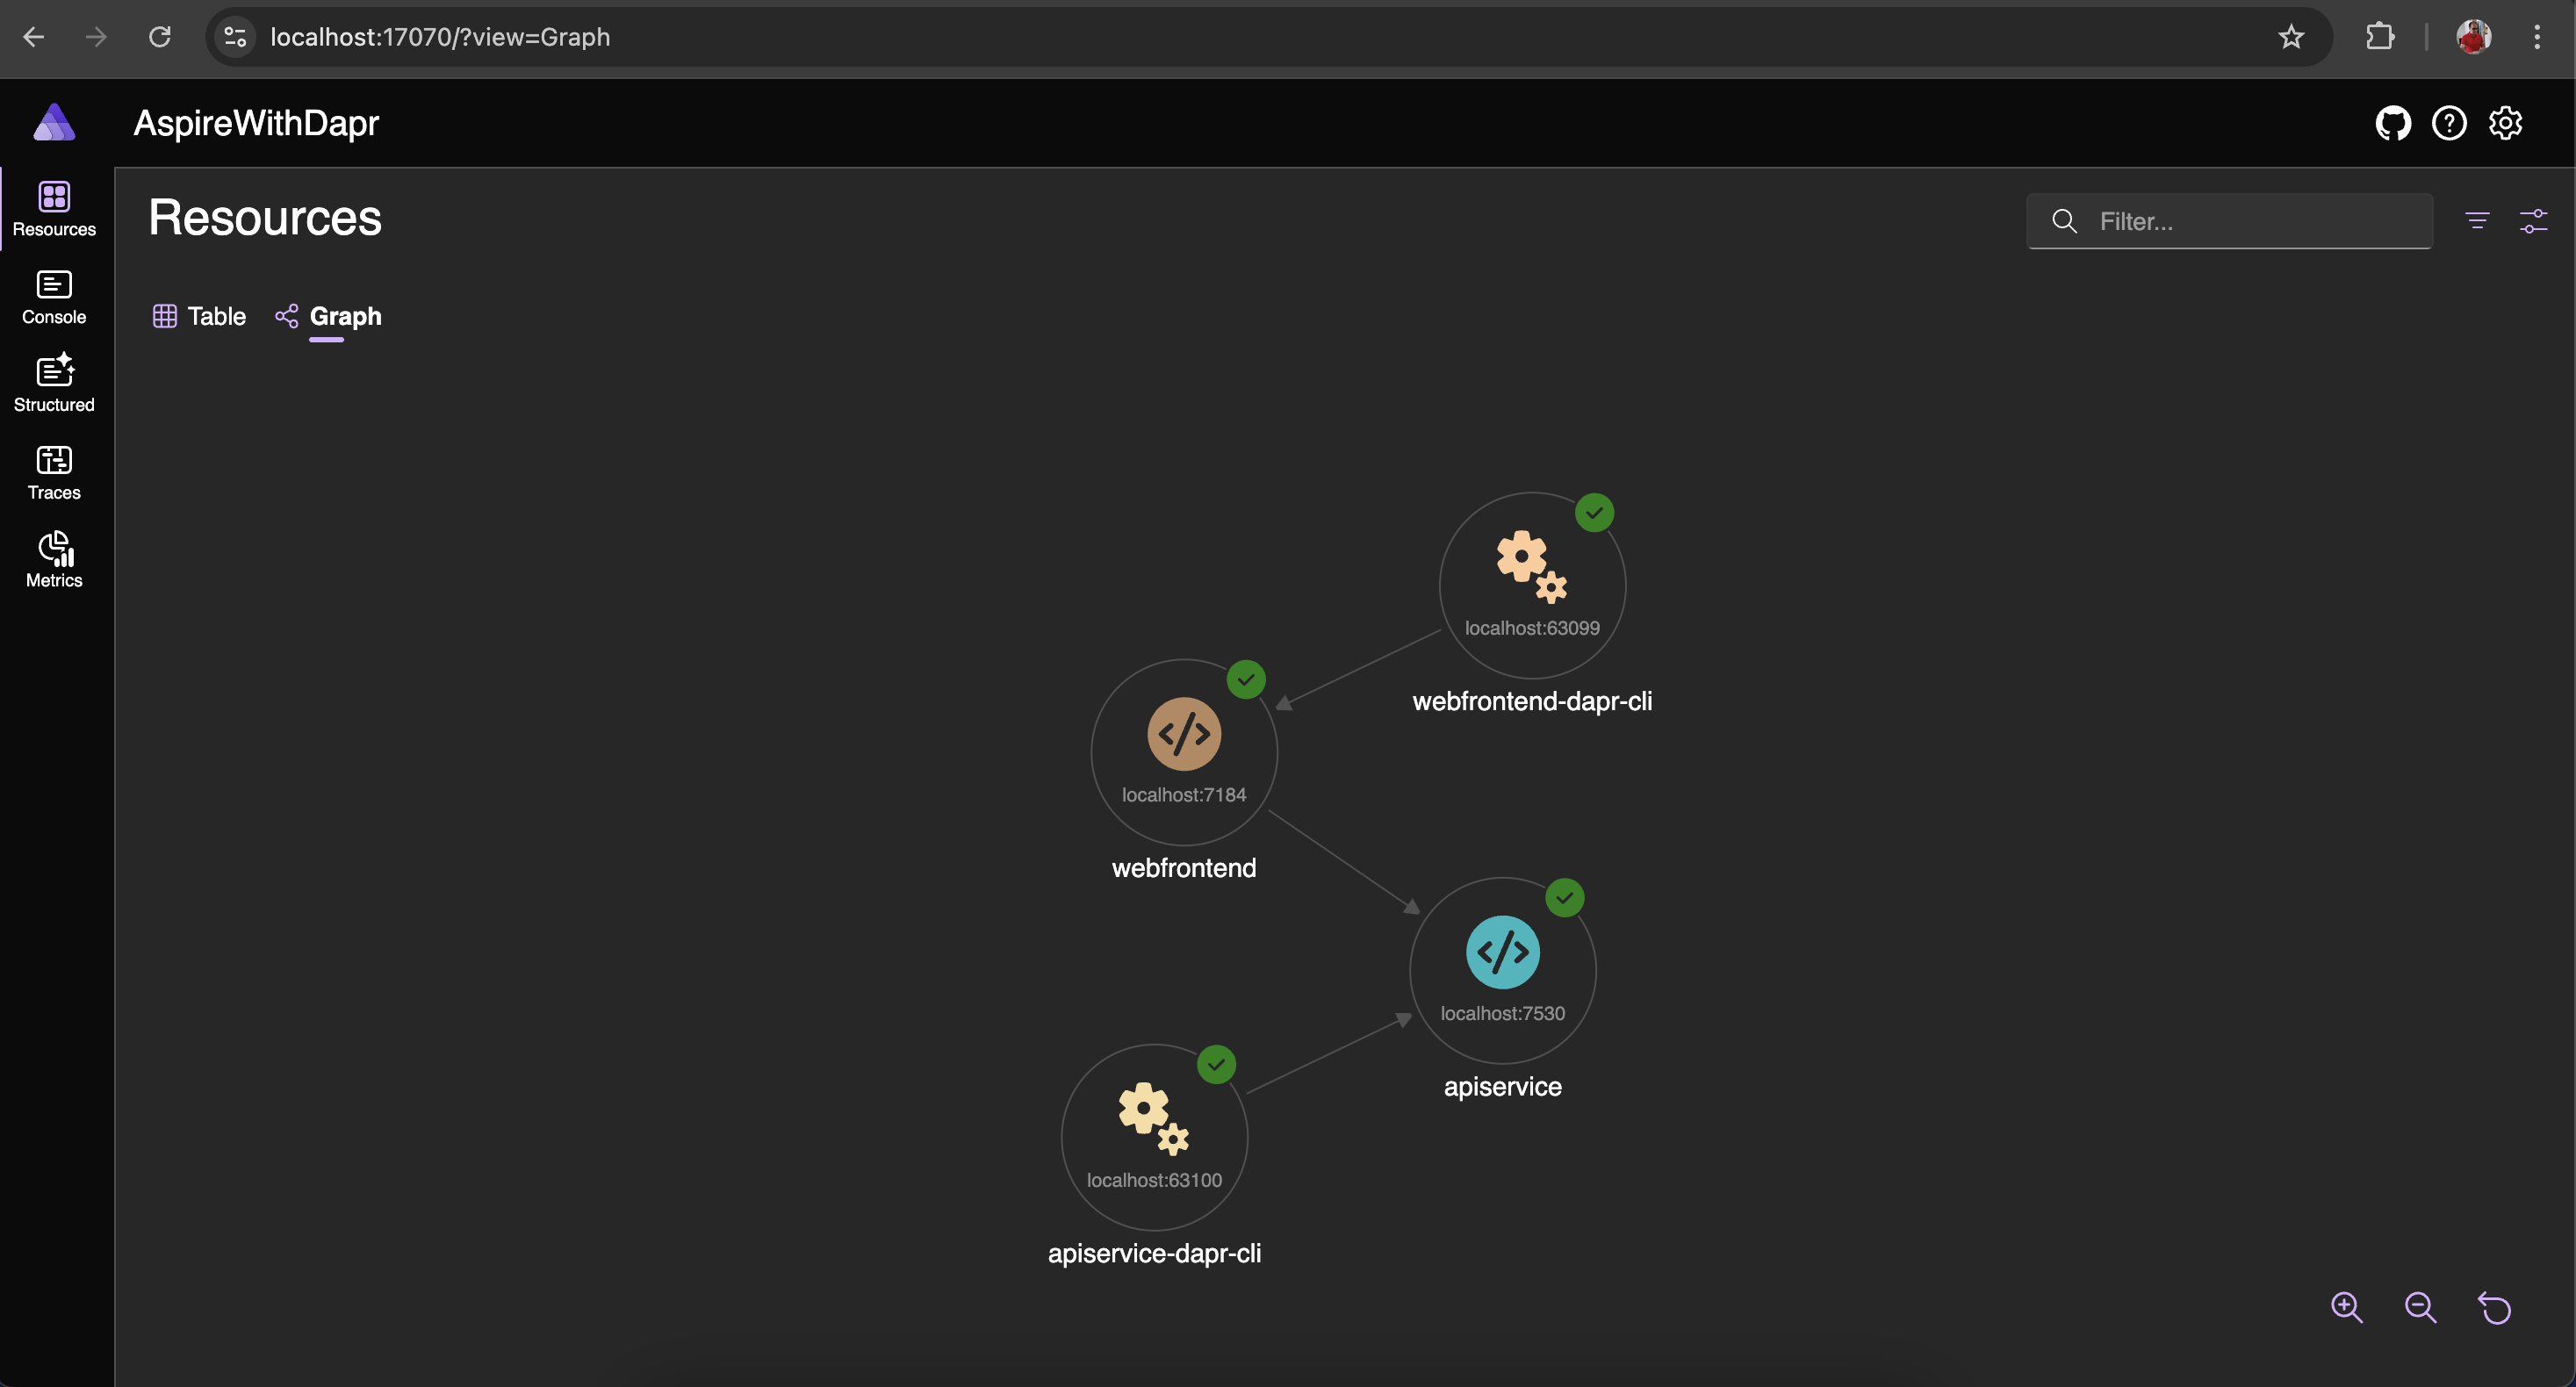
The diagram shown below briefly explains the workings of the demo app utilizing a Dapr sidecar. This demo application demonstrates the use of the Service Invocation building block.

- Request: Web App to Dapr sidecar Web App
- Request: Dapr sidecar Web App to Dapr sidecar API App
- Request: Dapr sidecar API App to API App
- Response: API App to Dapr sidecar API App
- Response: Dapr sidecar API App to Dapr sidecar Web App
- Response: Dapr sidecar Web App to Web App
From the dashboard, you can launch the webfrontend application and initiate a request to the backend API by selecting the Weather menu, allowing you to observe the complete request flow.
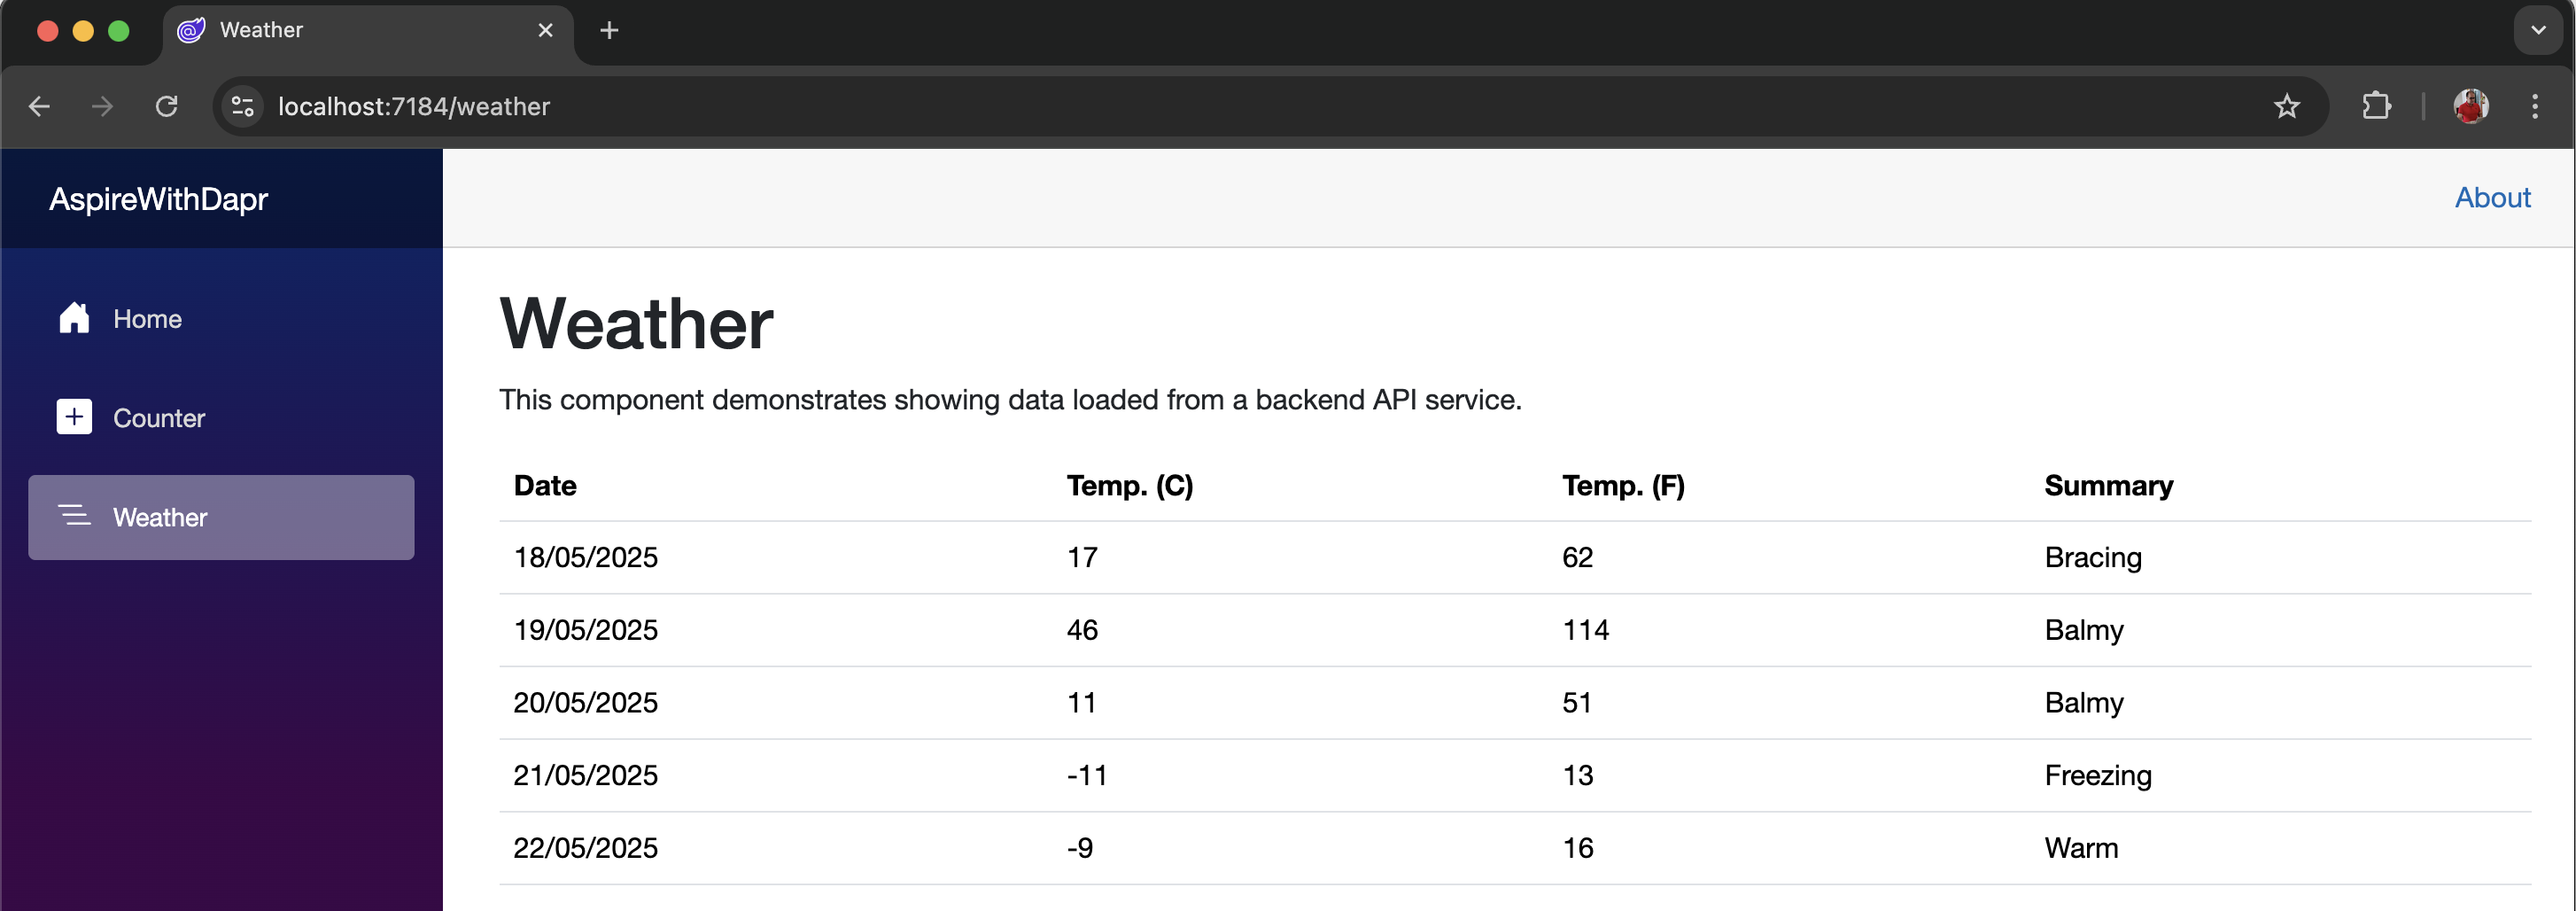

Since application is running successfully, you can proceed with the next step, which is to deploy it on a Kubernetes cluster.
Preparation of Local Docker Container Registry
You can refer Demystifying Kubernetes for developers blog post for more details.
# create a local Docker Container Registry to facilitate the push/pull of container images without depending on external registries.
docker run -d -p 5001:5000 --restart always --name my-registry registry:2
# Using below command, you can verfiy the content of the registry
curl http://localhost:5001/v2/_catalogPreparation of Kind (Kubernetes IN Docker) cluster
For guidance on setting up a Kind cluster, please refer to my earlier blog titled Demystifying Kubernetes for developers.
Create a file named kind-cluster-config.yaml, and paste the following:
kind: Cluster
apiVersion: kind.x-k8s.io/v1alpha4
containerdConfigPatches:
- |-
  [plugins."io.containerd.grpc.v1.cri".registry.mirrors."localhost:5001"]
    endpoint = ["http://my-registry:5000"]
nodes:
- role: control-plane
  kubeadmConfigPatches:
  - |
    kind: InitConfiguration
    nodeRegistration:
      kubeletExtraArgs:
        node-labels: "ingress-ready=true"
  extraPortMappings:
  - containerPort: 80
    hostPort: 8081
    protocol: TCP
  - containerPort: 443
    hostPort: 8443
    protocol: TCP
- role: worker
- role: worker
Run the kind create cluster command, providing the cluster configuration file:
kind create cluster --config kind-cluster-config.yamlExpected output
Creating cluster "kind" ...
 ✓ Ensuring node image (kindest/node:v1.33.1) 🖼
 ✓ Preparing nodes 📦 📦 📦
 ✓ Writing configuration 📜
 ✓ Starting control-plane 🕹️
 ✓ Installing CNI 🔌
 ✓ Installing StorageClass 💾
 ✓ Joining worker nodes 🚜
Set kubectl context to "kind-kind"
You can now use your cluster with:

kubectl cluster-info --context kind-kind

Have a nice day! 👋
# Run this command to establish network between Kind cluster and Local docker registry.
docker network connect "kind" "my-registry" # Refer your local container registryInitialize Dapr in Kubernetes cluster e.g., Kind cluster
dapr init --kubernetesExpected output
  Making the jump to hyperspace...
ℹ️  Note: To install Dapr using Helm, see here: https://docs.dapr.io/getting-started/install-dapr-kubernetes/#install-with-helm-advanced

ℹ️  Container images will be pulled from Docker Hub
✅  Deploying the Dapr control plane with latest version to your cluster...
✅  Deploying the Dapr dashboard with latest version to your cluster...
✅  Success! Dapr has been installed to namespace dapr-system. To verify, run `dapr status -k' in your terminal. To get started, go here: https://docs.dapr.io/getting-started
Once Dapr finishes initializing, you can use its components on the cluster.
Verify the status of the Dapr components:
dapr status -kExpected output
NAME                   NAMESPACE    HEALTHY  STATUS   REPLICAS  VERSION  AGE  CREATED
  dapr-dashboard         dapr-system  True     Running  1         0.15.0   3m   2025-05-17 22:35.23
  dapr-sidecar-injector  dapr-system  True     Running  1         1.15.5   3m   2025-05-17 22:35.22
  dapr-placement-server  dapr-system  True     Running  1         1.15.5   3m   2025-05-17 22:35.22
  dapr-sentry            dapr-system  True     Running  1         1.15.5   3m   2025-05-17 22:35.22
  dapr-operator          dapr-system  True     Running  1         1.15.5   3m   2025-05-17 22:35.22
  dapr-scheduler-server  dapr-system  True     Running  3         1.15.5   3m   2025-05-17 22:35.22
Forward a port to Dapr dashboard
dapr dashboard -k -p 9999Expected output
ℹ️  Dapr dashboard found in namespace:   dapr-system
ℹ️  Dapr dashboard available at: http://localhost:9999
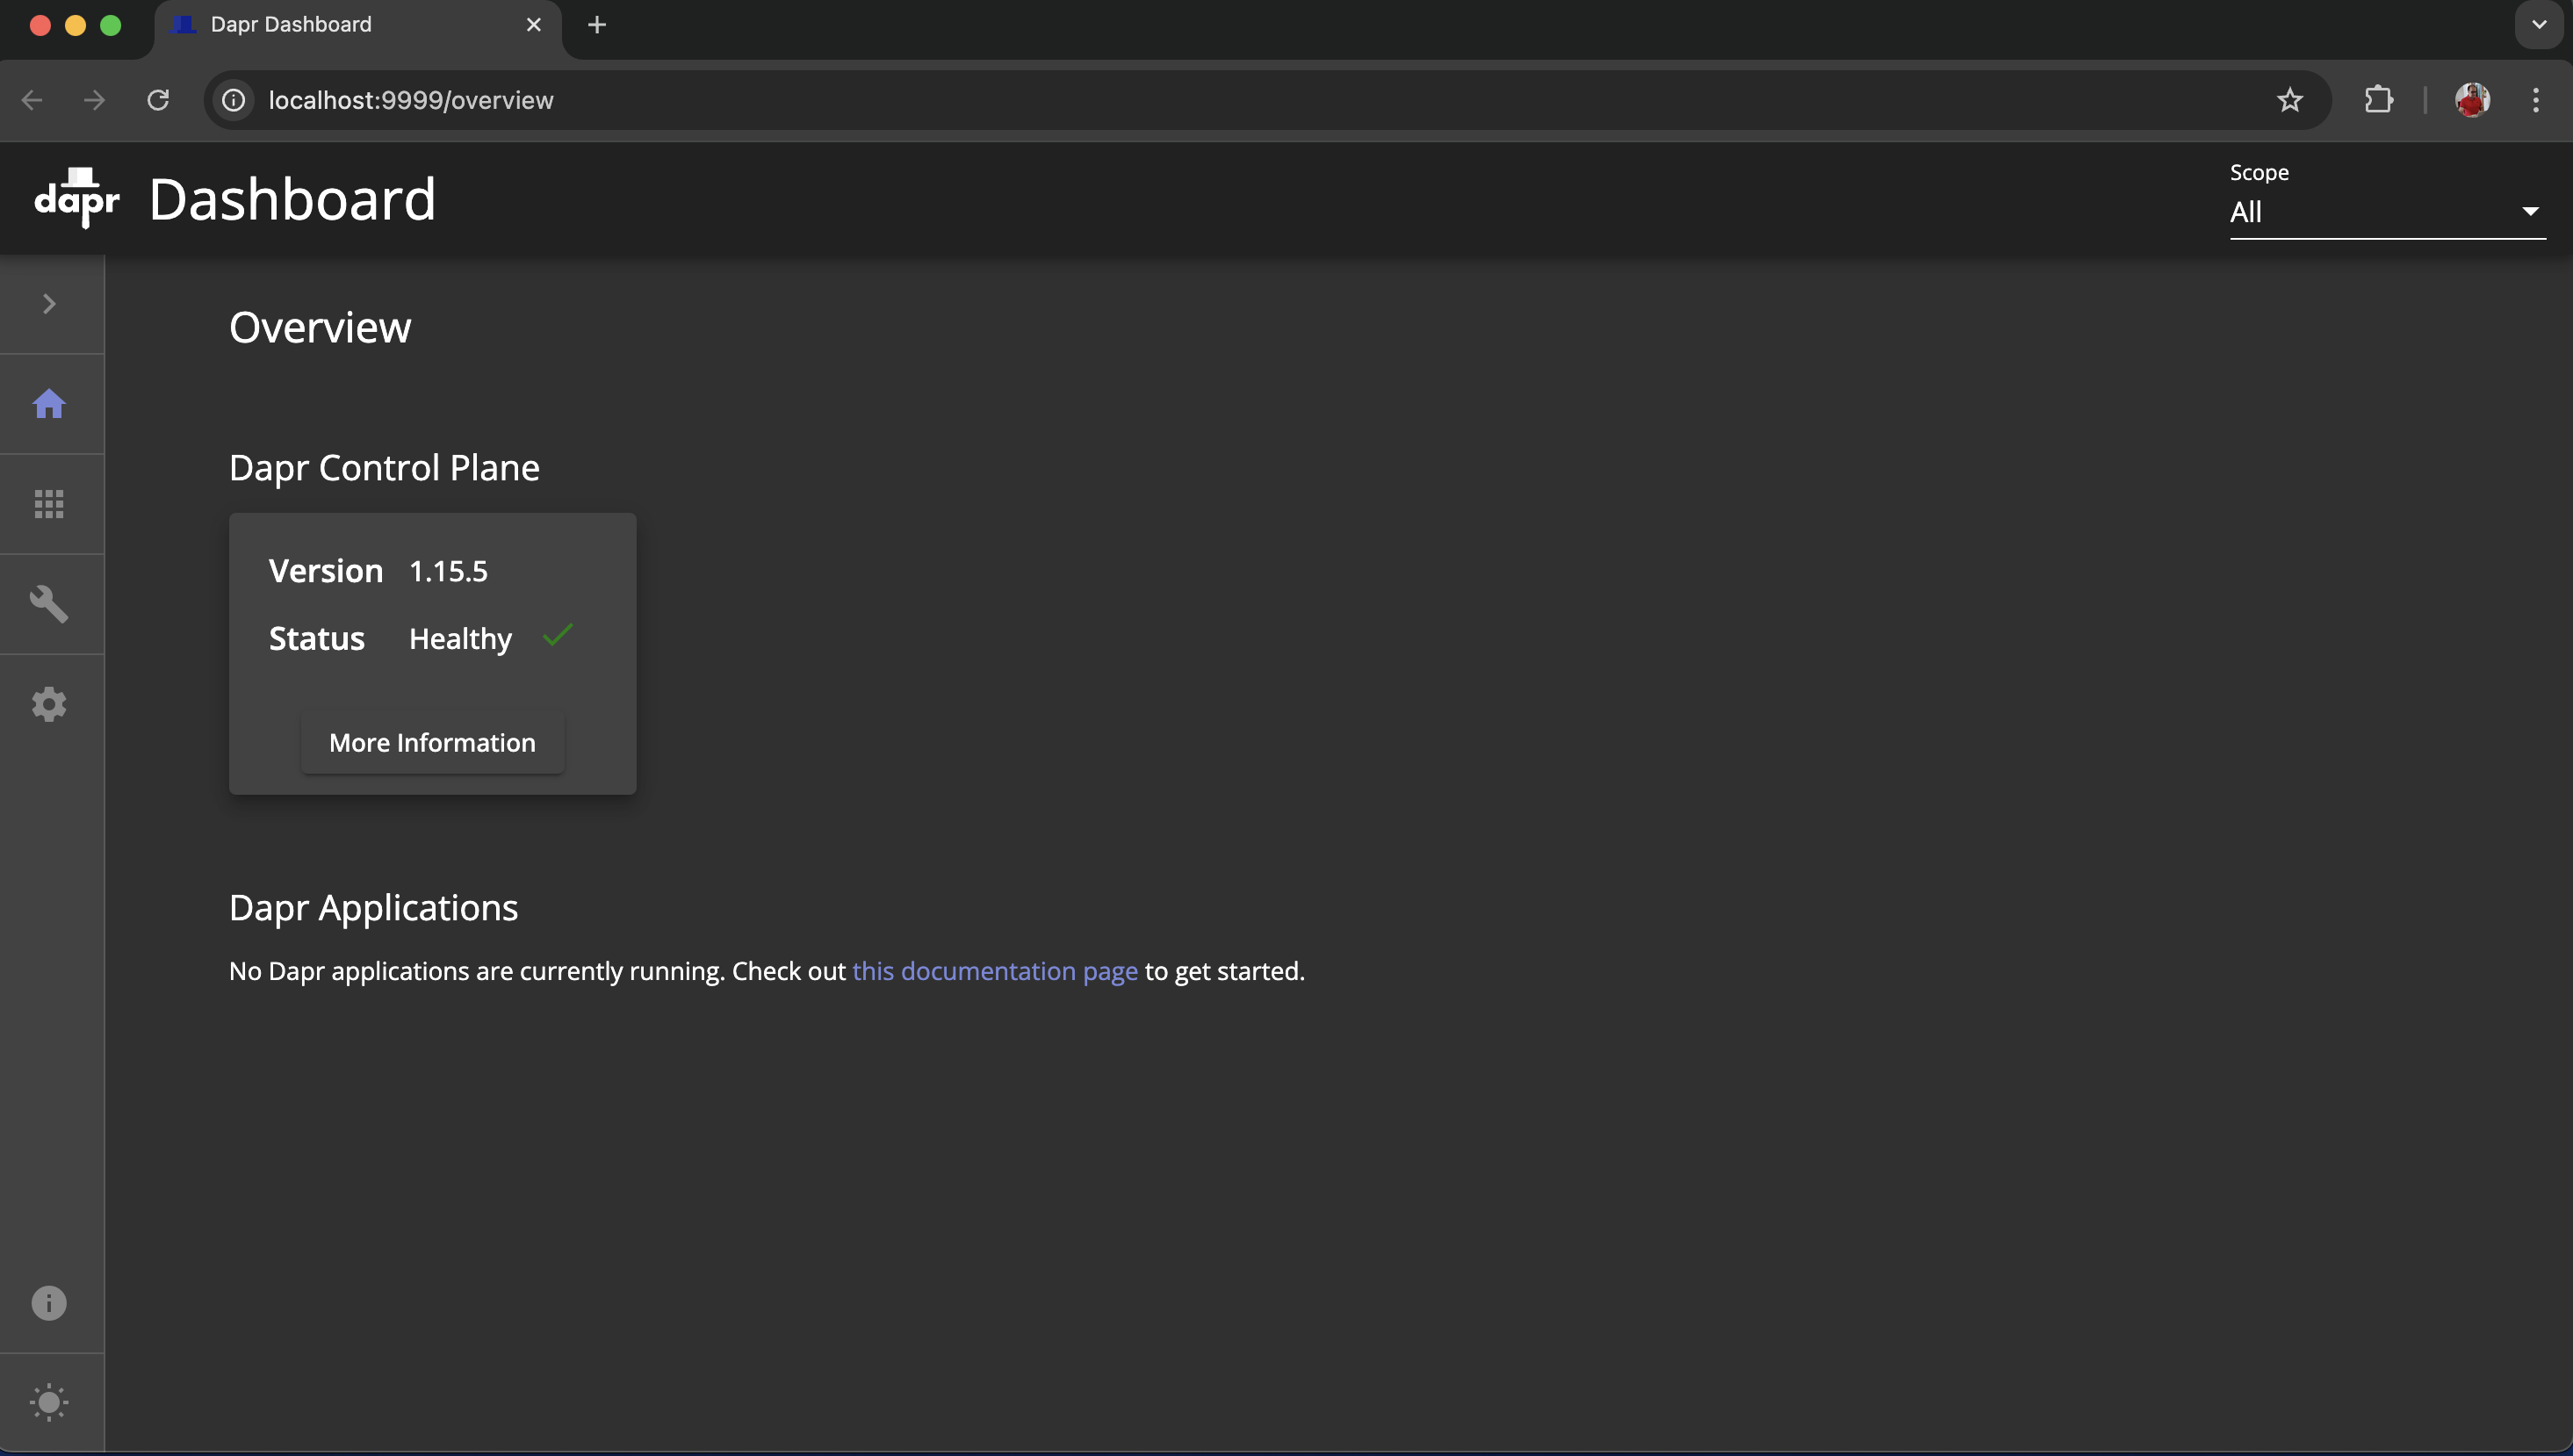
Navigate to http://localhost:9999 to validate a successful setup.
Install metrics-server on the Kind Kubernetes Cluster
# Get metrics-server manifest and keep into k8s folder
wget https://github.com/kubernetes-sigs/metrics-server/releases/latest/download/components.yaml
# Add insecure TLS parameter to the components.yaml file
apiVersion: v1
kind: ServiceAccount
metadata:
labels:
k8s-app: metrics-server
name: metrics-server
namespace: kube-system
---
apiVersion: rbac.authorization.k8s.io/v1
kind: ClusterRole
metadata:
labels:
k8s-app: metrics-server
rbac.authorization.k8s.io/aggregate-to-admin: "true"
rbac.authorization.k8s.io/aggregate-to-edit: "true"
rbac.authorization.k8s.io/aggregate-to-view: "true"
name: system:aggregated-metrics-reader
rules:
- apiGroups:
- metrics.k8s.io
resources:
- pods
- nodes
verbs:
- get
- list
- watch
---
apiVersion: rbac.authorization.k8s.io/v1
kind: ClusterRole
metadata:
labels:
k8s-app: metrics-server
name: system:metrics-server
rules:
- apiGroups:
- ""
resources:
- nodes/metrics
verbs:
- get
- apiGroups:
- ""
resources:
- pods
- nodes
verbs:
- get
- list
- watch
---
apiVersion: rbac.authorization.k8s.io/v1
kind: RoleBinding
metadata:
labels:
k8s-app: metrics-server
name: metrics-server-auth-reader
namespace: kube-system
roleRef:
apiGroup: rbac.authorization.k8s.io
kind: Role
name: extension-apiserver-authentication-reader
subjects:
- kind: ServiceAccount
name: metrics-server
namespace: kube-system
---
apiVersion: rbac.authorization.k8s.io/v1
kind: ClusterRoleBinding
metadata:
labels:
k8s-app: metrics-server
name: metrics-server:system:auth-delegator
roleRef:
apiGroup: rbac.authorization.k8s.io
kind: ClusterRole
name: system:auth-delegator
subjects:
- kind: ServiceAccount
name: metrics-server
namespace: kube-system
---
apiVersion: rbac.authorization.k8s.io/v1
kind: ClusterRoleBinding
metadata:
labels:
k8s-app: metrics-server
name: system:metrics-server
roleRef:
apiGroup: rbac.authorization.k8s.io
kind: ClusterRole
name: system:metrics-server
subjects:
- kind: ServiceAccount
name: metrics-server
namespace: kube-system
---
apiVersion: v1
kind: Service
metadata:
labels:
k8s-app: metrics-server
name: metrics-server
namespace: kube-system
spec:
ports:
- name: https
port: 443
protocol: TCP
targetPort: https
selector:
k8s-app: metrics-server
---
apiVersion: apps/v1
kind: Deployment
metadata:
labels:
k8s-app: metrics-server
name: metrics-server
namespace: kube-system
spec:
selector:
matchLabels:
k8s-app: metrics-server
strategy:
rollingUpdate:
maxUnavailable: 0
template:
metadata:
labels:
k8s-app: metrics-server
spec:
containers:
- args:
- --cert-dir=/tmp
- --secure-port=10250
- --kubelet-preferred-address-types=InternalIP,ExternalIP,Hostname
- --kubelet-use-node-status-port
- --kubelet-insecure-tls # Add this line
- --metric-resolution=15s
image: registry.k8s.io/metrics-server/metrics-server:v0.7.2
imagePullPolicy: IfNotPresent
livenessProbe:
failureThreshold: 3
httpGet:
path: /livez
port: https
scheme: HTTPS
periodSeconds: 10
name: metrics-server
ports:
- containerPort: 10250
name: https
protocol: TCP
readinessProbe:
failureThreshold: 3
httpGet:
path: /readyz
port: https
scheme: HTTPS
initialDelaySeconds: 20
periodSeconds: 10
resources:
requests:
cpu: 100m
memory: 200Mi
securityContext:
allowPrivilegeEscalation: false
capabilities:
drop:
- ALL
readOnlyRootFilesystem: true
runAsNonRoot: true
runAsUser: 1000
seccompProfile:
type: RuntimeDefault
volumeMounts:
- mountPath: /tmp
name: tmp-dir
nodeSelector:
kubernetes.io/os: linux
priorityClassName: system-cluster-critical
serviceAccountName: metrics-server
volumes:
- emptyDir: {}
name: tmp-dir
---
apiVersion: apiregistration.k8s.io/v1
kind: APIService
metadata:
labels:
k8s-app: metrics-server
name: v1beta1.metrics.k8s.io
spec:
group: metrics.k8s.io
groupPriorityMinimum: 100
insecureSkipTLSVerify: true
service:
name: metrics-server
namespace: kube-system
version: v1beta1
versionPriority: 100After upating components.yaml, you can run below command to apply changes to the kubernetes cluster.
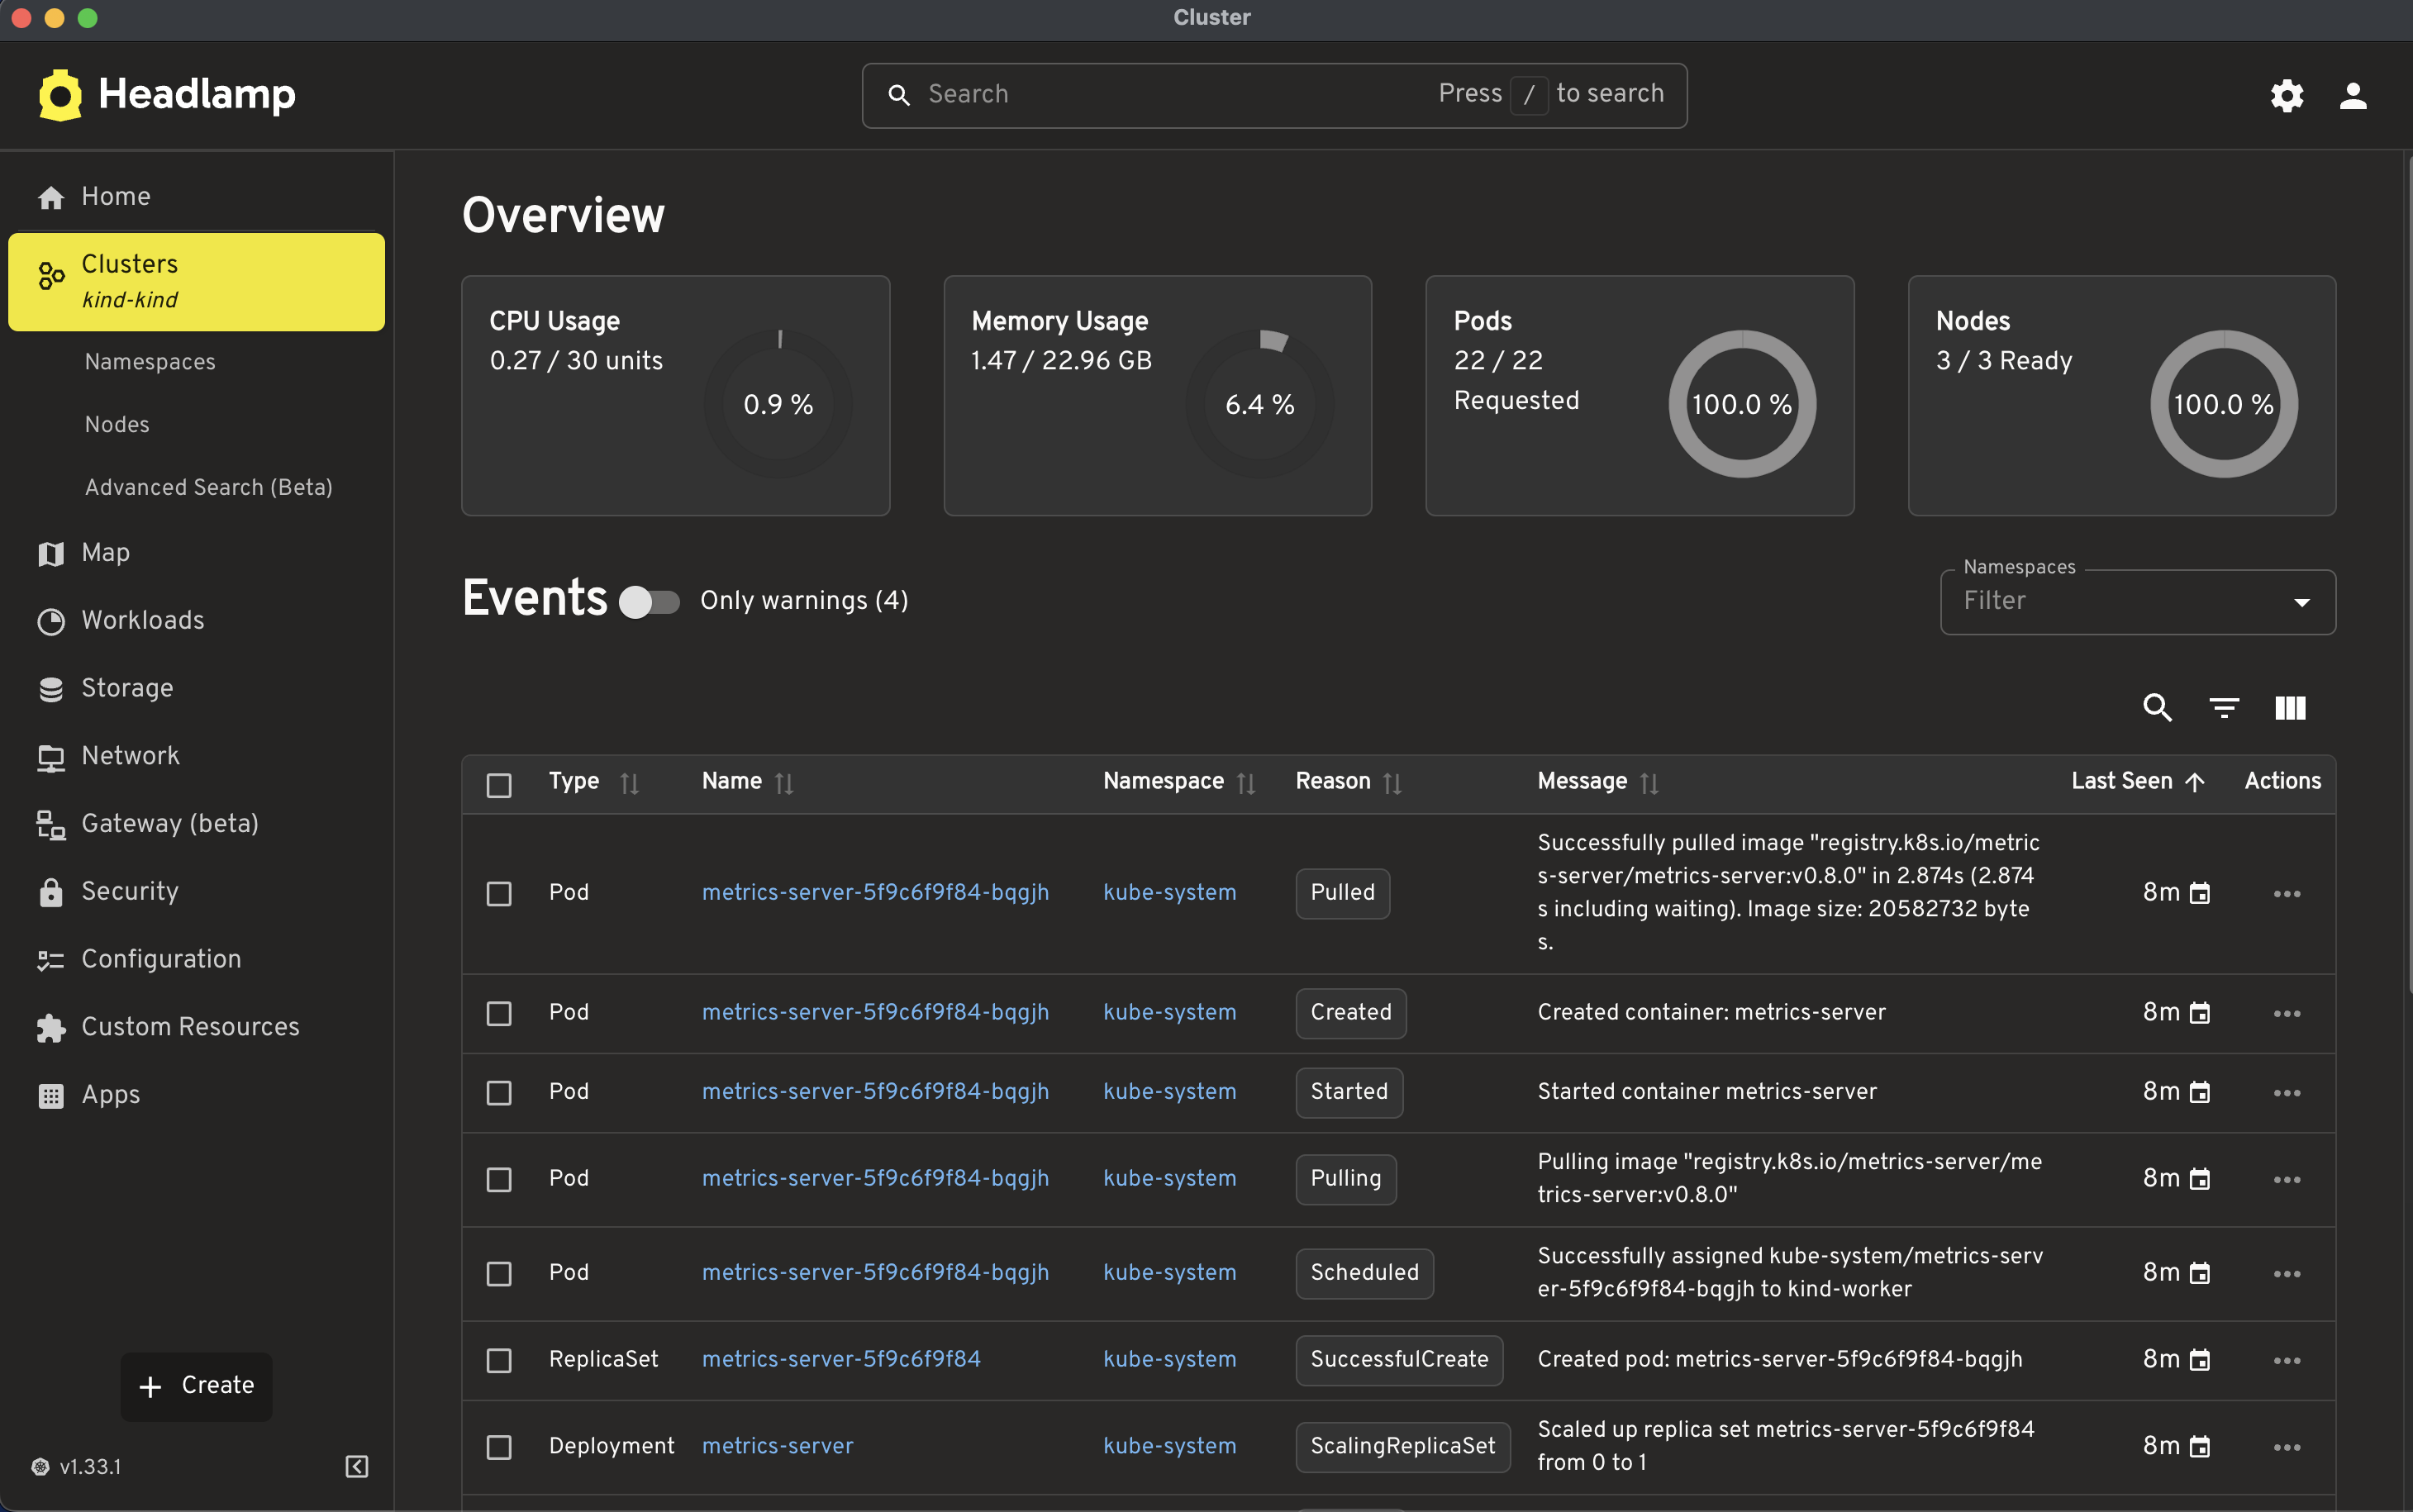
kubectl apply -f components.yamlYou can vefiry cluster details including CPU, Memory and Pods. I have used Headlamp, it is a user-friendly Kubernetes UI focused on extensibility.
Deploying on K8S (Kubernetes)
Now, we are ready with Demo App including daprization of the app and successfully prepared K8S environment to host it. We be using Aspirate (Aspir8) tool to help us to deploy it on the kubernetes cluster. To know more about Aspirate (Aspir8), you can earlier blog .NET Aspire and Aspirate(Aspir8). Additionally you can visit Aspir8
Aspir8 is shipped to nuget as .NET Core Global Tool, which means you can install it using below command.
# To install Aspirate
dotnet tool install -g aspirate --prerelease
How to verify installation of Aspirate?
# Run this command on the terminal
aspirate -h

     _                    _           ___
    / \     ___   _ __   (_)  _ __   ( _ )
   / _ \   / __| | '_ \  | | | '__|  / _ \
  / ___ \  \__ \ | |_) | | | | |    | (_) |
 /_/   \_\ |___/ | .__/  |_| |_|     \___/
                 |_|
Handle deployments of a .NET Aspire AppHost

Description:

Usage:
  aspirate [command] [options]

Options:
  --version       Show version information
  -?, -h, --help  Show help and usage information

Commands:
  init      Initializes aspirate settings within your AppHost directory.
  run       Builds, pushes containers, and runs the current solution directly against a kubernetes cluster.
  stop      Stops a deployment that has been made using 'aspirate run' by destroying it.
  generate  Builds, pushes containers, generates aspire manifest, helm chart and kustomize manifests.
  build     Builds and pushes containers
  apply     Apply the generated kustomize manifest to the cluster.
  destroy   Removes the manifests from your cluster..
  settings  Managed Aspir8 settings.
Navigate to your Aspire project's AppHost directory, and run below commands to generate manifest files for Kubernetes and deploying to a kubernetes cluster.
# # This command allows you to bootstrap certain settings for an Aspire project that Aspir8 will use.
# ContainerRegistry, ContainerTag, TemplatePath
aspirate init
# You can follow instruction as
_ _ ___
/ \ ___ _ __ (_) _ __ ( _ )
/ _ \ / __| | '_ \ | | | '__| / _ \
/ ___ \ \__ \ | |_) | | | | | | (_) |
/_/ \_\ |___/ | .__/ |_| |_| \___/
|_|
Handle deployments of a .NET Aspire AppHost
── Handle Initialization Defaults ────────────────────────────────────────────────────────────────────────────────────────────────────────────────────────────────────────────────────────────────────────────────────────────
(✔) Done: Set 'Container builder' to 'docker'.
Aspirate supports setting a fall-back value for projects that have not yet set a 'ContainerRegistry' in their csproj file.
Would you like to set a fall-back value for the container registry? [y/n] (n): y
Please enter the container registry to use as a fall-back value: localhost:5001
(✔) Done: Set 'Container fallback registry' to 'localhost:5001'.
Aspirate supports setting a repository prefix for all for projects.
Would you like to set this value? [y/n] (n): n
(✔) Done: Set 'Container fallback tag' to 'latest'.
Aspirate supports setting a custom directory for 'Templates' that are used when generating kustomize manifests.
Would you like to use a custom directory (selecting 'n' will default to built in templates ? [y/n] (n): n
(✔) Done: Configuration for aspirate has been bootstrapped successfully at '/Users/architect/Documents/source/AspireWithDapr/AspireWithDapr.AppHost/./aspirate.json'.
🚀 Execution Completed 🚀aspirate generate# You can follow instruction as
_ _ ___
/ \ ___ _ __ (_) _ __ ( _ )
/ _ \ / __| | '_ \ | | | '__| / _ \
/ ___ \ \__ \ | |_) | | | | | | (_) |
/_/ \_\ |___/ | .__/ |_| |_| \___/
|_|
Handle deployments of a .NET Aspire AppHost
── Handling Aspirate State ─────────────────────────────────────────────────────────────────────────────────────────────────────────────────────────────────────────────────────────────────────────────
── Handling Aspirate Secrets ───────────────────────────────────────────────────────────────────────────────────────────────────────────────────────────────────────────────────────────────────────────
Secrets are to be protected by a password
Please enter new Password: ****
Please enter it again to confirm: ****
Secret State has been initialised!.
── Handling Configuration ──────────────────────────────────────────────────────────────────────────────────────────────────────────────────────────────────────────────────────────────────────────────
── Handling Aspire Manifest ────────────────────────────────────────────────────────────────────────────────────────────────────────────────────────────────────────────────────────────────────────────
Generating Aspire Manifest for supplied App Host
(✔) Done: Created Aspire Manifest At Path: /Users/architect/Documents/source/AspireWithDapr/AspireWithDapr.AppHost/manifest.json
── Selecting Required Components ───────────────────────────────────────────────────────────────────────────────────────────────────────────────────────────────────────────────────────────────────────
── Handling Aspire Dashboard ───────────────────────────────────────────────────────────────────────────────────────────────────────────────────────────────────────────────────────────────────────────
Would you like to deploy the aspire dashboard and connect the OTLP endpoint? [y/n] (y): n
(!) Skipping Aspire Dashboard deployment
── Handling Inputs ─────────────────────────────────────────────────────────────────────────────────────────────────────────────────────────────────────────────────────────────────────────────────────
── Handle Value and Parameter Substitution ─────────────────────────────────────────────────────────────────────────────────────────────────────────────────────────────────────────────────────────────
── Handling DAPR Components ────────────────────────────────────────────────────────────────────────────────────────────────────────────────────────────────────────────────────────────────────────────
── Gathering Information about deployables ─────────────────────────────────────────────────────────────────────────────────────────────────────────────────────────────────────────────────────────────
Gathering container details for each project in selected components
(✔) Done: Populated container details cache for project apiservice
(✔) Done: Populated container details cache for project webfrontend
Gathering Tasks Completed - Cache Populated.
── Handling Projects ───────────────────────────────────────────────────────────────────────────────────────────────────────────────────────────────────────────────────────────────────────────────────
Building all project resources, and pushing containers
Executing: dotnet publish "/Users/architect/Documents/source/AspireWithDapr/AspireWithDapr.AppHost/../AspireWithDapr.ApiService/AspireWithDapr.ApiService.csproj" -t:PublishContainer --verbosity
"quiet" --nologo -r "linux-arm64" -p:ContainerRepository="apiservice" -p:ContainerImageTag="latest"
(✔) Done: Building and Pushing container for project apiservice
Executing: dotnet publish "/Users/architect/Documents/source/AspireWithDapr/AspireWithDapr.AppHost/../AspireWithDapr.Web/AspireWithDapr.Web.csproj" -t:PublishContainer --verbosity "quiet" --nologo -r
"linux-arm64" -p:ContainerRepository="webfrontend" -p:ContainerImageTag="latest"
(✔) Done: Building and Pushing container for project webfrontend
Building and push completed for all selected project components.
── Handling Dockerfiles ────────────────────────────────────────────────────────────────────────────────────────────────────────────────────────────────────────────────────────────────────────────────
No Dockerfile components selected. Skipping build and publish action.
── Populating Secrets File ─────────────────────────────────────────────────────────────────────────────────────────────────────────────────────────────────────────────────────────────────────────────
No secrets to protect in any selected components
── Handle Image Pull Policy ────────────────────────────────────────────────────────────────────────────────────────────────────────────────────────────────────────────────────────────────────────────
── Handling Namespace ──────────────────────────────────────────────────────────────────────────────────────────────────────────────────────────────────────────────────────────────────────────────────
Would you like to deploy all manifests to a custom namespace? [y/n] (n): n
Generated manifests will be deployed to the default namespace.
── Handle Kustomize Manifests ──────────────────────────────────────────────────────────────────────────────────────────────────────────────────────────────────────────────────────────────────────────
Generating kustomize manifests to run against your kubernetes cluster:
(✔) Done: Generating /Users/architect/Documents/source/AspireWithDapr/AspireWithDapr.AppHost/aspirate-output/apiservice
(✔) Done: Generating /Users/architect/Documents/source/AspireWithDapr/AspireWithDapr.AppHost/aspirate-output/webfrontend
── Handling Final Manifest ─────────────────────────────────────────────────────────────────────────────────────────────────────────────────────────────────────────────────────────────────────────────
Would you like to generate the top level kustomize manifest to run against your kubernetes cluster? [y/n] (y): y
Generating final manifest with name 'kustomization.yaml'
(✔) Done: Generating aspirate-output/kustomization.yaml
🚀 Execution Completed 🚀NOTE: Occasionally, the aspirate generate command may fail to access the local registry. If this happens, try starting Docker Desktop to resolve the issue.
The manifests will be in the AppHost/aspirate-output directory by default.
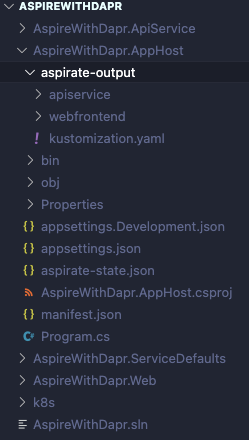
NOTE: At the time of writing this blog,Aspirate (Aspir8) does not generate fully functional Kubernetes manifests for Dapr-enabled applications. The Aspir8 team may address this issue in a future releases. Until then, you may need to manually update the deployment.yaml files for both the apiservice and webfrontend components.
Please refer to the updated deployment files below.
# updated deployment.yaml of apiservice
apiVersion: apps/v1
kind: Deployment
metadata:
  name: apiservice
  labels:
    app: apiservice
spec:
  minReadySeconds: 60
  replicas: 1
  selector:
    matchLabels:
      app: apiservice
  strategy:
    type: Recreate
  template:
    metadata:
      labels:
        app: apiservice
      annotations:
        dapr.io/enabled: 'true'
        dapr.io/app-id: apiservice
        dapr.io/app-port: '8080'
    spec:
      containers:
      - name: apiservice
        image: localhost:5001/apiservice:latest
        imagePullPolicy: IfNotPresent
        ports:
        - name: http
          containerPort: 8080
        - name: https
          containerPort: 8443
        envFrom:
        - configMapRef:
            name: apiservice-env
      terminationGracePeriodSeconds: 180
# updated deployment.yaml of webfrontend
apiVersion: apps/v1
kind: Deployment
metadata:
name: webfrontend
labels:
app: webfrontend
spec:
minReadySeconds: 60
replicas: 1
selector:
matchLabels:
app: webfrontend
strategy:
type: Recreate
template:
metadata:
labels:
app: webfrontend
annotations:
dapr.io/enabled: 'true'
dapr.io/app-id: webfrontend
dapr.io/app-port: '8080'
spec:
containers:
- name: webfrontend
image: localhost:5001/webfrontend:latest
imagePullPolicy: IfNotPresent
ports:
- name: http
containerPort: 8080
- name: https
containerPort: 8443
envFrom:
- configMapRef:
name: webfrontend-env
terminationGracePeriodSeconds: 180To apply the manifest to the kubernetes cluster, run
aspirate apply# You can follow instruction as
_ _ ___
/ \ ___ _ __ (_) _ __ ( _ )
/ _ \ / __| | '_ \ | | | '__| / _ \
/ ___ \ \__ \ | |_) | | | | | | (_) |
/_/ \_\ |___/ | .__/ |_| |_| \___/
|_|
Handle deployments of a .NET Aspire AppHost
── Handling Aspirate State ─────────────────────────────────────────────────────────────────────────────────────────────────────────────────────────────────────────────────────────────────────────────
Loading state from /Users/architect/Documents/source/AspireWithDapr/AspireWithDapr.AppHost/aspirate-state.json.
Would you like to use all previous state values, and skip re-prompting where possible ? [y/n] (y): n
(✔) Done: State has been disabled for this run. Only secrets will be populated.
── Handling Aspirate Secrets ───────────────────────────────────────────────────────────────────────────────────────────────────────────────────────────────────────────────────────────────────────────
Secrets are protected by a password. Please enter it now: ****
(✔) Done: Secret State populated successfully.
── Handle Deployment to Cluster ────────────────────────────────────────────────────────────────────────────────────────────────────────────────────────────────────────────────────────────────────────
Would you like to deploy the generated manifests to a kubernetes cluster defined in your kubeconfig file? [y/n] (y): y
(✔) Done: Successfully set the Active Kubernetes Context to 'kind-kind'
Executing: kubectl apply --server-side -k /Users/architect/Documents/source/AspireWithDapr/AspireWithDapr.AppHost/aspirate-output against kubernetes context kind-kind.
configmap/apiservice-env serverside-applied
configmap/webfrontend-env serverside-applied
service/apiservice serverside-applied
service/webfrontend serverside-applied
deployment.apps/apiservice serverside-applied
deployment.apps/webfrontend serverside-applied
(✔) Done: Deployments successfully applied to cluster 'kind-kind'You can verify the deployment using the command below
kubectl get allkubectl get all
NAME READY STATUS RESTARTS AGE
pod/apiservice-8577c6994c-4hg4r 2/2 Running 0 23m
pod/webfrontend-69965f5f44-mqkqt 2/2 Running 0 23m
NAME TYPE CLUSTER-IP EXTERNAL-IP PORT(S) AGE
service/apiservice ClusterIP 10.96.180.149 <none> 8080/TCP,8443/TCP 23m
service/apiservice-dapr ClusterIP None <none> 80/TCP,50001/TCP,50002/TCP,9090/TCP 23m
service/kubernetes ClusterIP 10.96.0.1 <none> 443/TCP 4d22h
service/webfrontend ClusterIP 10.96.129.218 <none> 8080/TCP,8443/TCP 23m
service/webfrontend-dapr ClusterIP None <none> 80/TCP,50001/TCP,50002/TCP,9090/TCP 23m
NAME READY UP-TO-DATE AVAILABLE AGE
deployment.apps/apiservice 1/1 1 1 23m
deployment.apps/webfrontend 1/1 1 1 23m
NAME DESIRED CURRENT READY AGE
replicaset.apps/apiservice-8577c6994c 1 1 1 23m
replicaset.apps/webfrontend-69965f5f44 1 1 1 23mThe READY column showing 2/2 for both pods confirms that the Dapr sidecar is successfully running alongside the application containers (apiservice and webfrontend).
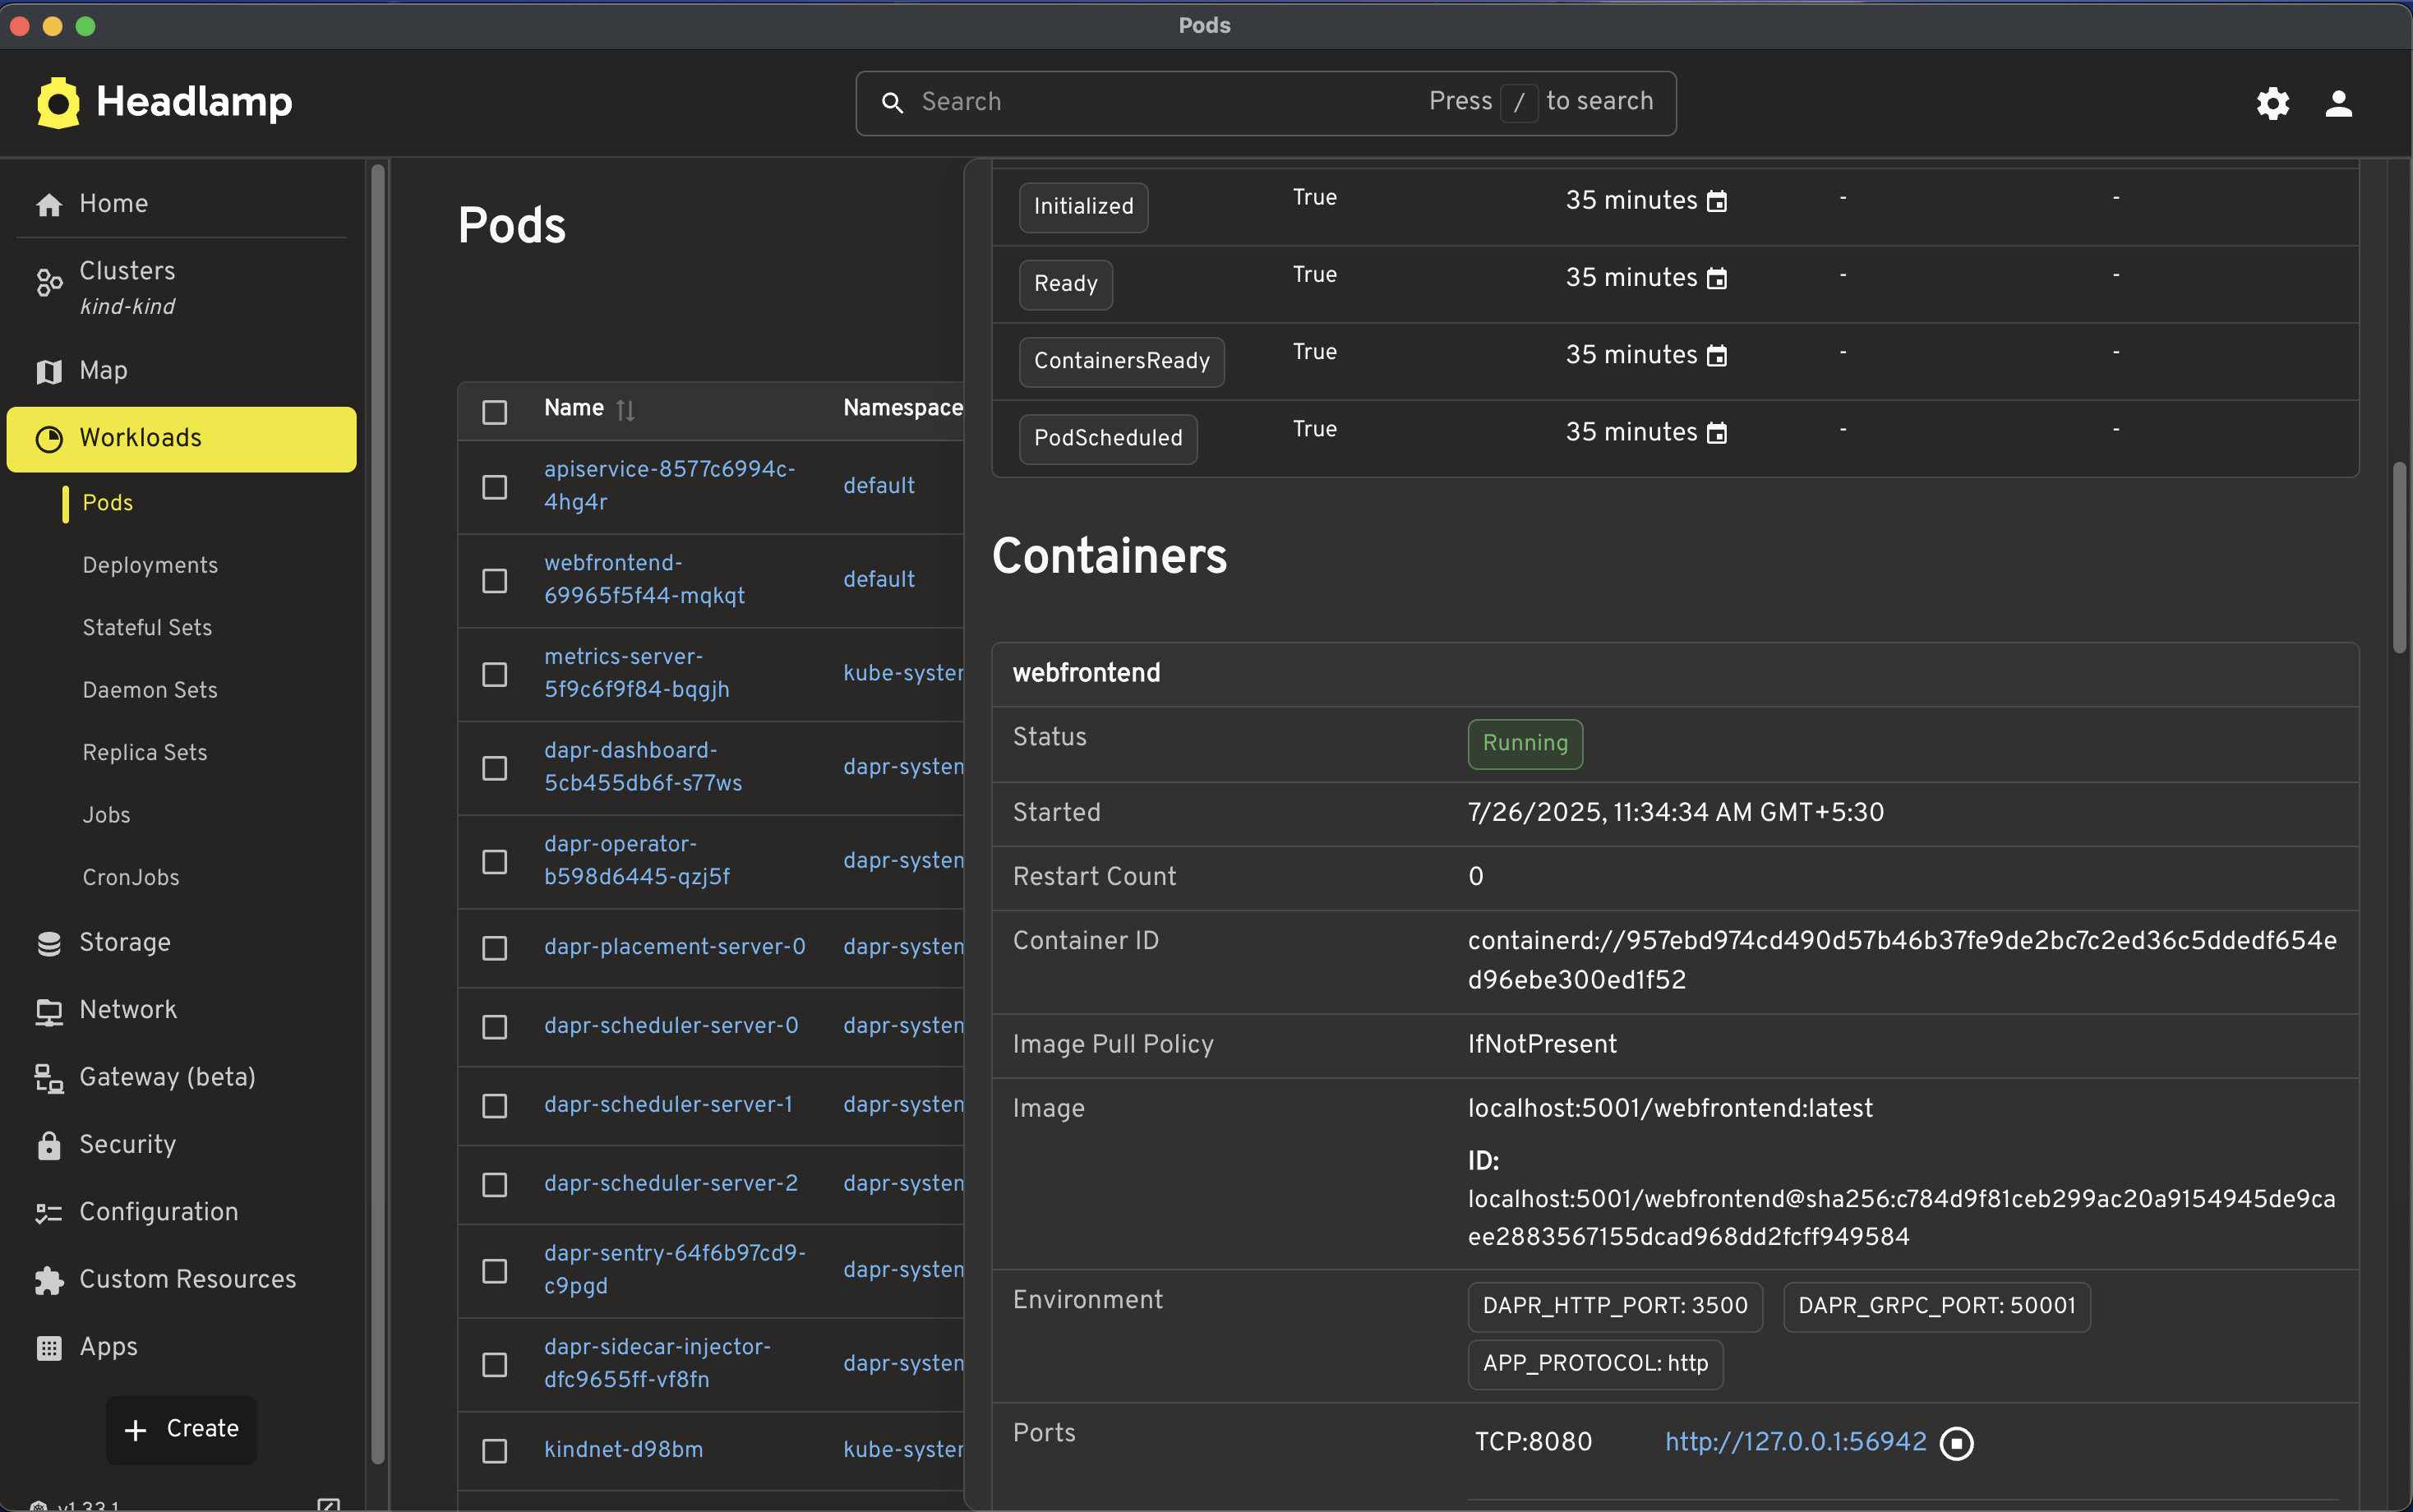
You can also launch Headlamp to verify the deployment and check the status of the pods. To access the application, click on the webfrontend pod and enable port-forwarding.
Refer to the screenshot below, where the application is being accessed via http://127.0.0.1:56942/


Conclusion
If you're building distributed applications with .NET, .NET Aspire offers a streamlined experience for local development, while Dapr provides a set of building block APIs with built-in cross-cutting concerns such as security and resiliency that can be easily integrated into your application.